

If you've been building your product using Nerves on a Raspberry Pi and want to port your code to a CM4 device, this guide may help you.
Here are the things you'll want to have first:
a CM4 device with eMMC
a CM4 IO Board raspberrypi.com/products/compute-module-4-i..
a Jumper 2-PIN like here: sparkfun.com/products/9044
a 12V - 2.5A Power with 2.1mm Jack Barrel
a Micro-USB to USB cable
Optionally, a UART to TTL Serial cable if you want to see logs in case of problems adafruit.com/product/954
Here are the things you'll need to install on your machine:
libusb (on macOS -->
brew install pkgconfig libusb)rpiboot
git clone https://github.com/raspberrypi/usbbootcd usbbootmakeThis will compile
rpibootthat we'll need later
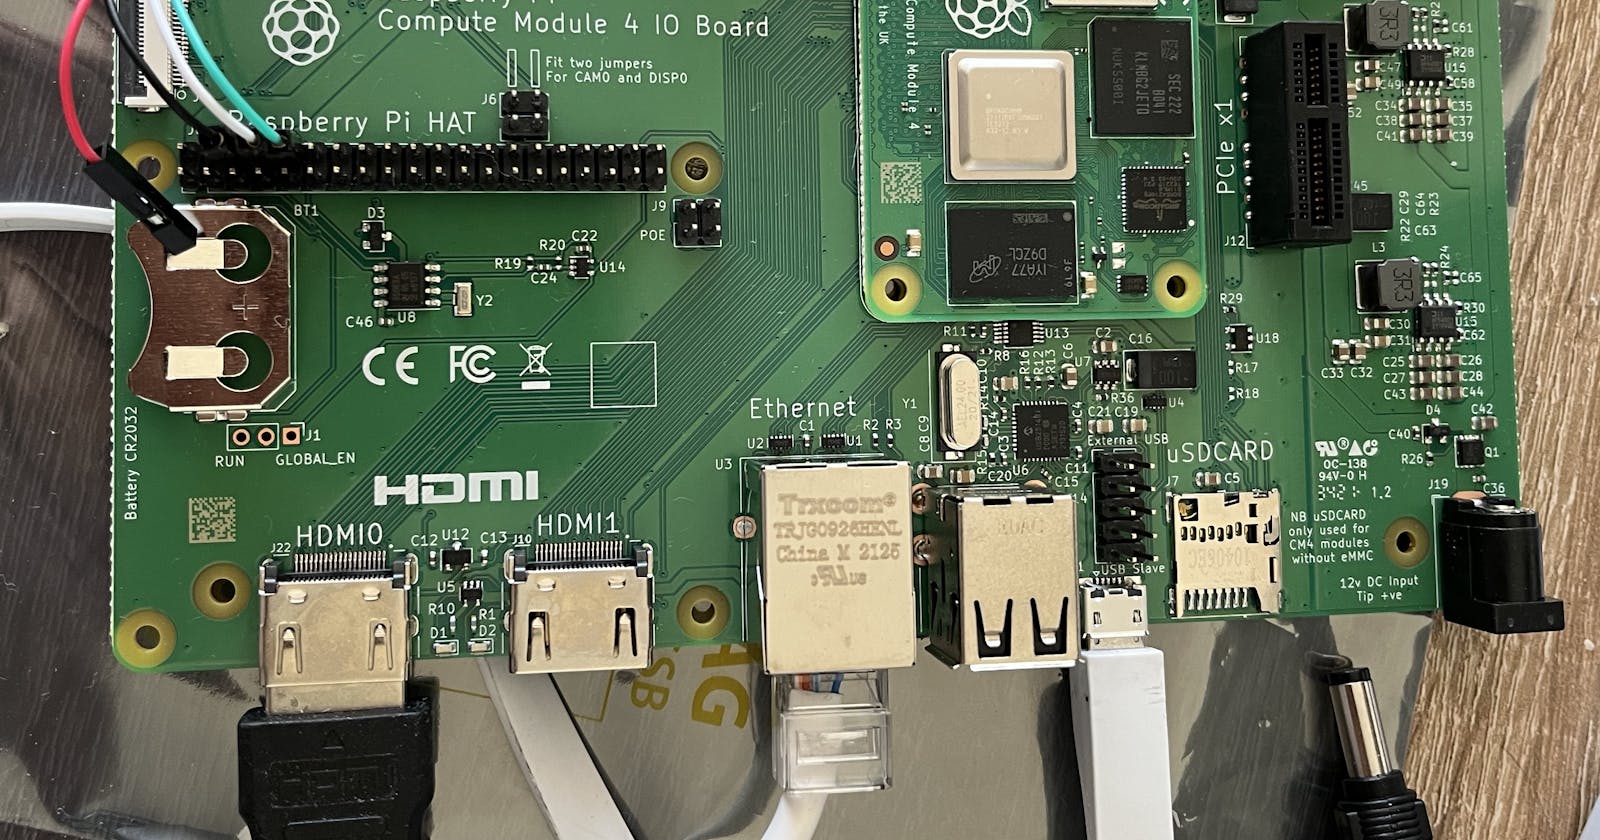
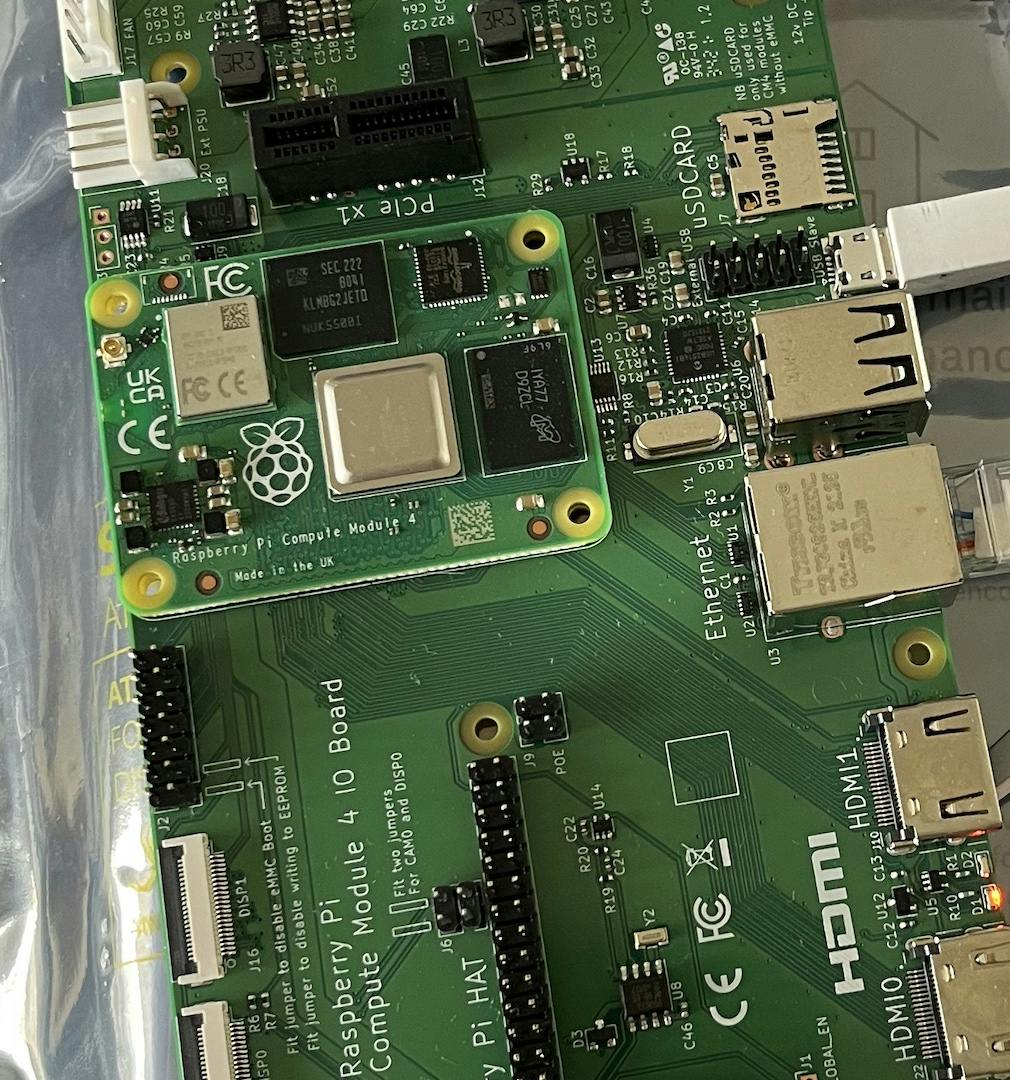
Plug the CM4 to the IO Board as follow:
Apply the jumper on the J2 position as follow:
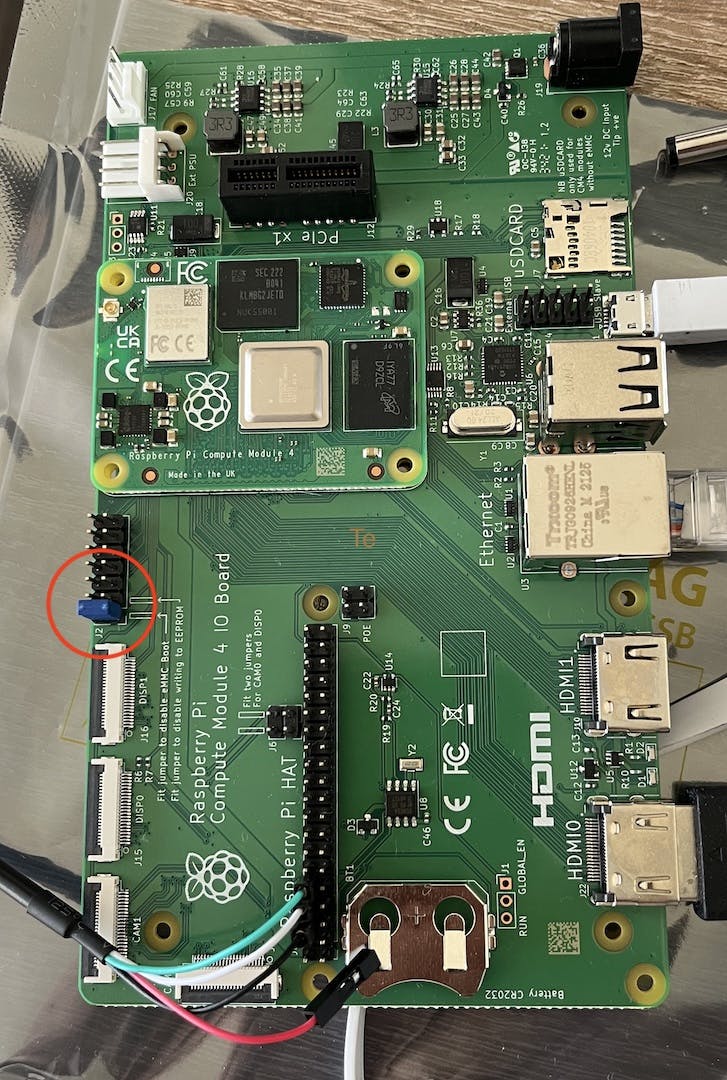
This will prevent the CM4 to boot from eMMC.
Connect the Micro-USB port to your computer.
Now power on the CM4 IO Board, the D1 LED should turn on.
Launch rpiboot sudo ./rpiboot, this will mount the volume on your computer.
The D2 LED should turn on as well to indicate activity.
Now we're ready to install our firmware to the eMMC.
There are three possible approaches:
Use
MIX_TARGET=rpi4 mix burn. This will allow you to flash the image directly on the mounted disk.Build your firmware:
MIX_TARGET=rpi4 mix firmware.This will generate a file inside_build/rpi4_dev/nerves/images/. Now you can just flash the image to the eMMc:fwup _build/rpi4_dev/nerves/images/hello_nerves.fwIt will automatically find the eMMC booted diskAlternatively, you can use fwup to create an .img file from that newly generated .fw file:
fwup -a -d hello_nerves.img -i hello_nerves.fw -t complete.
From there, you can use a tool such as Raspberry Pi Imager, Balena Etcher or dd to write that image file to the mounted volume.
Make sure to eject the mounted volume and power off the CM4 IO Board. You can now remove the jumper to allow booting from the eMMC.
Optionally, if you want to debug things because something went wrong, you can use the UART to TTL Serial cable as follow:
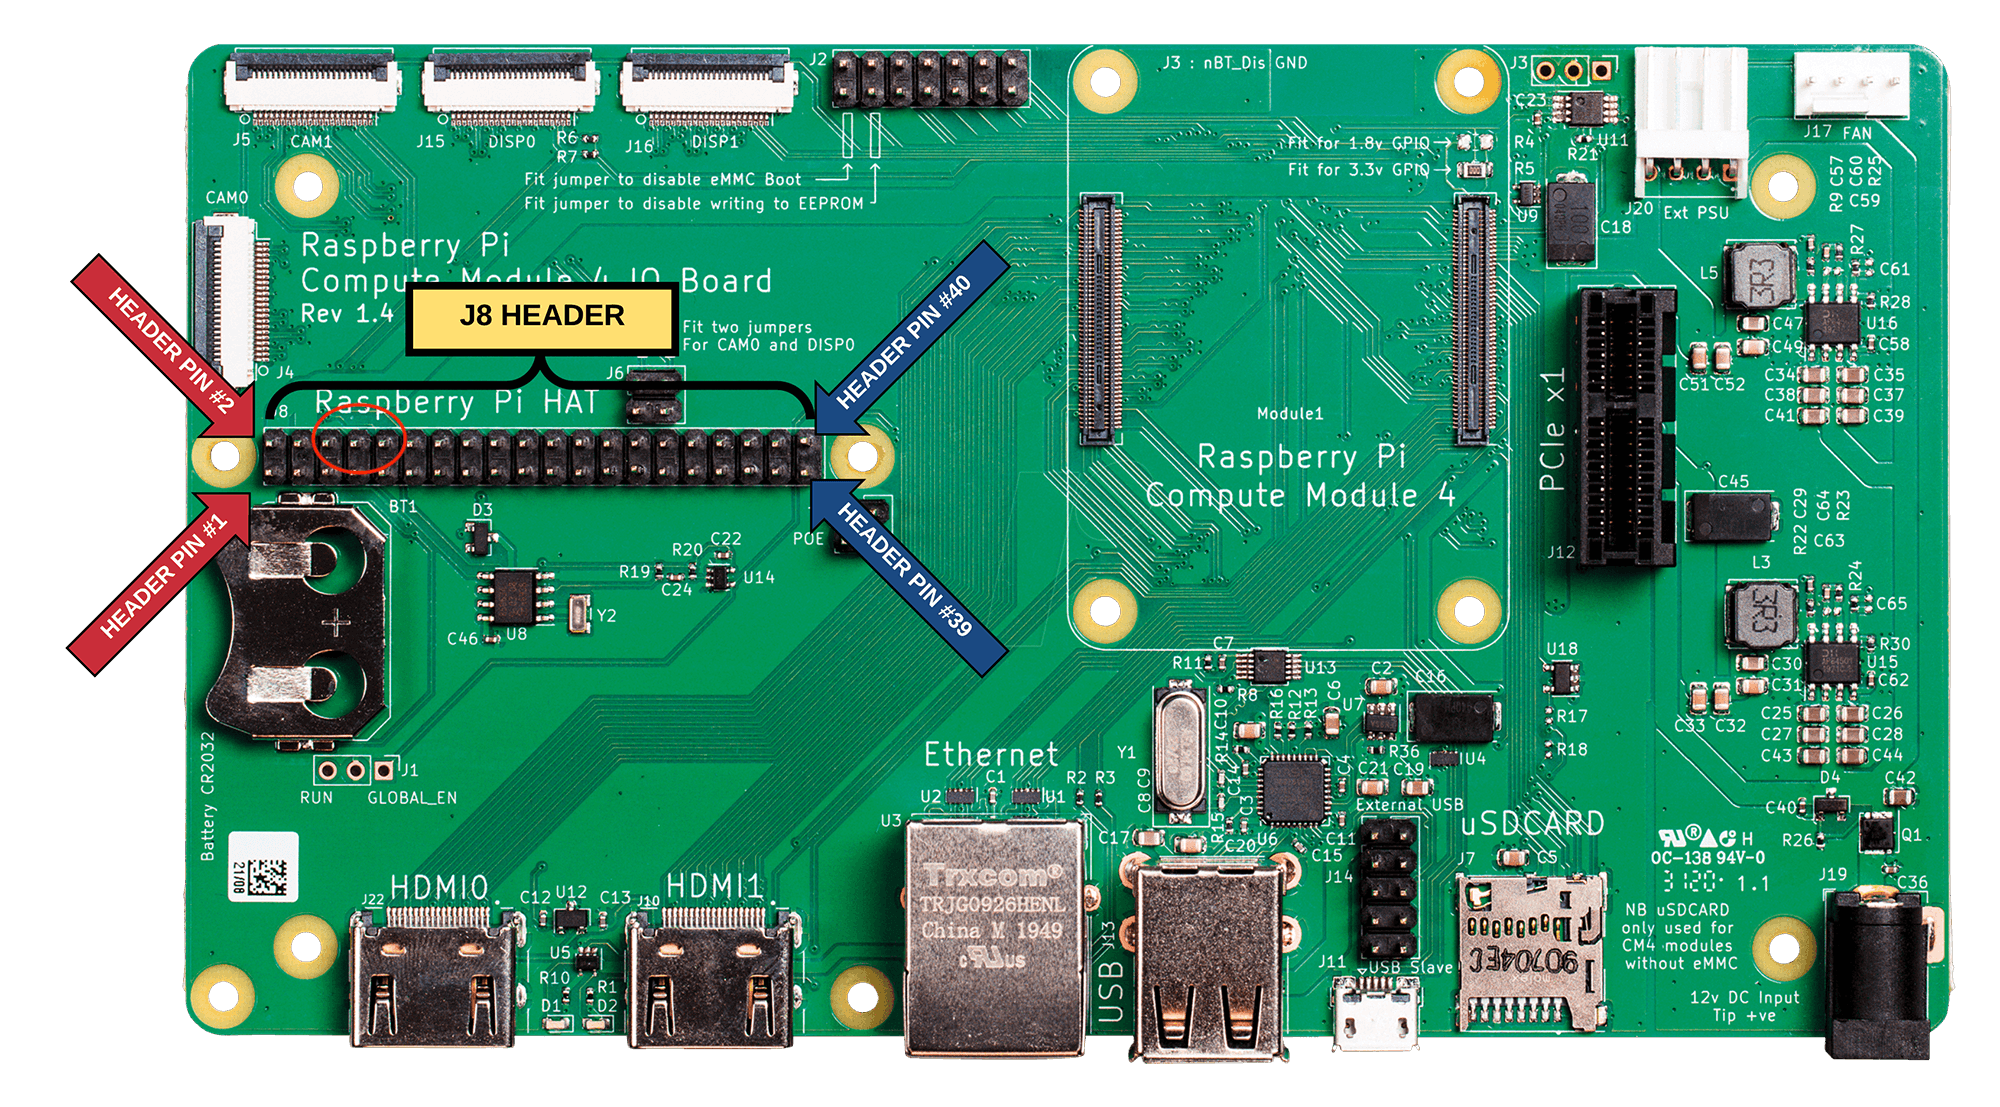
Connect the UART on the CM4 GPIO RX/TX/GND pins

Using the mentioned cable:
black goes to Ground
white to RX
green to TX
Don't forget to install the drivers:
Mac: learn.adafruit.com/adafruits-raspberry-pi-l..
Linux: learn.adafruit.com/adafruits-raspberry-pi-l..
Finally use screen to read the serial data: serial /dev/cu.SLAB_USBtoUART 115200 (your device might be named differently) If everything is fine you should see something like that during the boot process:
RPi: BOOTLOADER release VERSION:2b28285b DATE: 2022/07/14 TIME: 19:58:04 BOOTMODE: 0x00000007 part: 0 BUILD_TIMESTAMP=1657825084 0x8b97519a 0x00d03141 0x00d7b1b6
PM_RSTS: 0x00001000
part 00000000 reset_info 00000000
uSD voltage 3.3V
Initialising SDRAM 'Micron' 32Gb x2 total-size: 64 Gbit 3200
DDR 3200 1 0 64 152
[    0.514340] brcm-pcie fd500000.pcie: link down
[    0.885655] F2FS-fs (mmcblk0p3): Can't find valid F2FS filesystem in 1th superblock
[    0.893920] F2FS-fs (mmcblk0p3): Can't find valid F2FS filesystem in 2th superblock
erlinit: The shell will be launched on tty 'tty1'.
erlinit: If you would like the shell to be on this tty,
erlinit: configure erlinit with '-c ttyS0'.
erlinit: The hostname is 'nerves-519a'.
Happy flashing!